Easy Homemade Valentine’s Day Cake Pops
Valentine’s Day is such a fun holiday to celebrate and these Easy Homemade Valentine’s Day Cake Pops are so easy and absolutely delicious that you’ll want to make them for all your friends and family this year! We’ve got step-by-step instructions for this sweet treat, and trust me, these are as simple as can be!

Want to save this recipe for another time?
Happy Valentine’s Day, everyone! I love a delicious cake pop! And once I found out how easy they were to make at home, there was no turning back! They are so much fun to make and you can decorate them to commemorate any occasion or holiday! Today we are making Valentine’s Cake Pops and I can’t wait for this delicious treat to be ready! This is a super easy cake pop recipe, so let’s get going!
These cake pops do require some time to #1 – bake the cake and #2 – firm up and let the chocolate coating or melting chips harden before storage, so plan accordingly. It’s not a recipe to start late at night!
If you are looking for more fun dessert recipes, try my 3-Ingredient Chocolate Truffles, my Easy No-Bake Smores Snack Mix, or my always festive Cinnamon Sugar Sprinkle Cookies! Let’s get to making sweet treats!

Why You’ll Love This Recipe
- No Complicated Equipment: All you need is a microwave! And you could even use the stove to melt your chocolate melts if necessary.
- Customizeability: You can make whatever flavor combinations you’d like with this recipe! You can choose your cake mix flavor, your frosting flavor AND your coating flavor! The combinations are endless!
- Easy recipe – This recipe is truly so easy to make and gives you a big WOW at the end. These cake pops on a stick are perfect to take as gifts and treats to loved ones!
Equipment Recommendations
This post contains affiliate links. If you purchase something from those links, I may make a small commission. See our full Disclosure and Disclaimer Policy here.
- Baking Sheets – These Nordic Ware natural aluminum commercial baker’s half sheets are my absolute favorite baking sheets I’ve ever owned in my cooking days! They are super heavy-duty, have a great rim around them, and they stay in great shape no matter what you cook on them. And they clean up incredibly easily as well!
- Glass Mixing Bowls – This is a nesting set of glass bowls. I find I can’t have enough glass bowls in my kitchen!
- Spatula Set – This is the greatest set ever. Not only does it have several handy spatulas, it has a few tiny ones too, to help you get every single scrape out of jars and containers!
- Lollipop Sticks – I like these really sturdy ones. Plus, this comes with the covers and wraps to make them all pretty for gifting!
- Melting Sauce Pan – I love this little pot and I use it all the time for melting things like butter and chocolate. It’s so cute and charming and it just makes me happy every time I pull it out!
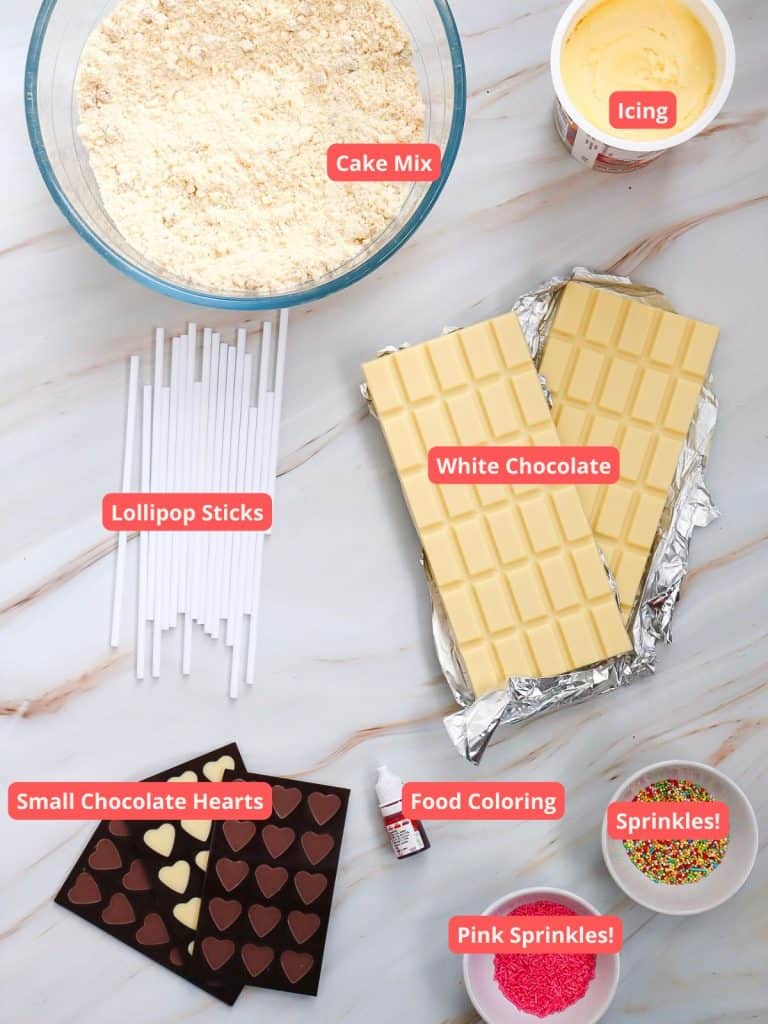
Ingredients:
- Lollipop Sticks: You’ll need 20 lollipop sticks. I like to use the thicker round ones intended to be a cake pop stick like you find HERE. I like the thicker, more sturdy ones, they just make it so much easier to handle the pops.
- Cake Mix: Pick any flavor you’d like. For this, I used yellow cake mix. But truly, the sky is the limit and so are the flavor combinations. How cute would pink pops be with strawberry cake mix?! Or red velvet cake mix?! Delicious, too!
- Frosting: Again, the only limit here is your own imagination! You need one tub of cake icing that’s next to the cake mixes in the grocery store. You can use regular vanilla or cream cheese frosting. Truly, and kind is fine, it’s not going to be outwardly visible!
- White Chocolate Chips: I like to get a nice white chocolate bar. But the white candy melts will work just fine too and they are also delicious!
- Red (Or Pink!) Food Coloring: You could leave the coating all white, and that’s totally fine if you want. But I like a combo of white and pink ones myself!
- Sprinkles: Get whatever kind of sprinkles make your heart soar! They will all stick to the melted chocolate beautifully, so try any kind you like!
Optional Ingredients:
- Small Chocolate Hearts (For Decoration, if desired): These are super cute to put on some of the cake pops!
- Writing Icing: If you want to write a message on the candy coating of your cake pop, like “LOVE” or “XOXO” then you might want a small tube of icing that’s made to write with, like this kind.

Cooking Notes
You’ll be making the cake mix according to the package directions, so also make sure you have the ingredients that the cake mix calls for on hand as well as the additional ingredients for the cake pops.
Yield: Approximately 20 cake pops
Total Time: 4 hours (including cooling & setting times)

Substitutions, Modifications, and Additions
You can change and modify so many things about this recipe!
Substitutions
- Homemade Icing and Cake – If storebought icing and cake aren’t your thing, feel free to make homemade icing and cake! The icing will need to be thick so that it holds the cake crumbs together in “Formable” shapes.
- Bakery Cake – Not a baker? No problem! Just get a plain cake without frosting at the grocery store that’s already baked for you!
Modifications
- Gluten-Free – This is super easy to make gluten-free! Just make sure you use a gluten-free cake mix and gluten-free icing! I know for sure all the icing that’s made by Betty Crocker is gluten-free. Generally, most candy melts, chocolates and white chocolates are gluten-free, but make sure to always read the labels to make sure.
- Dairy-Free – The same goes here – make the cake mix without using dairy ingredients. You can use applesauce in place of the eggs. And coconut oil or vegan butter or vegetable oil in place of any butter the mix recipe calls for!
Additions
- Chocolate Chips – Get some mini chocolate chips and add them to the crumble cake mixture and and mix well before you add in the icing.
- Nuts – Chopped nuts are also super tasty in cake pops!

Step by Step Instructions
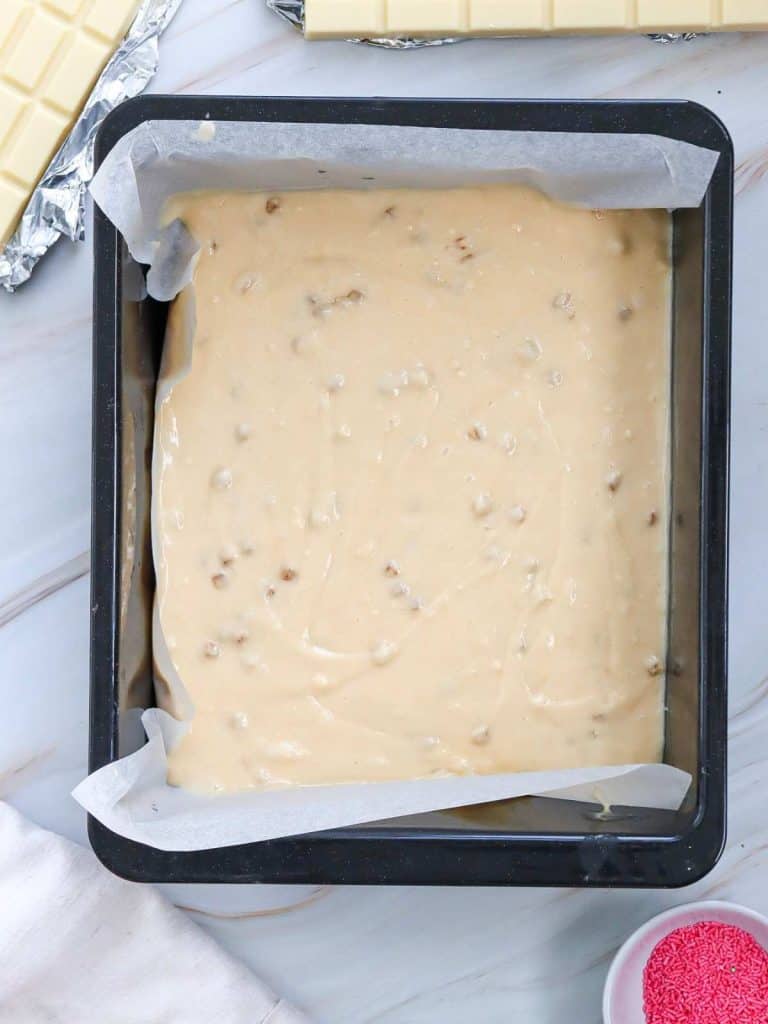
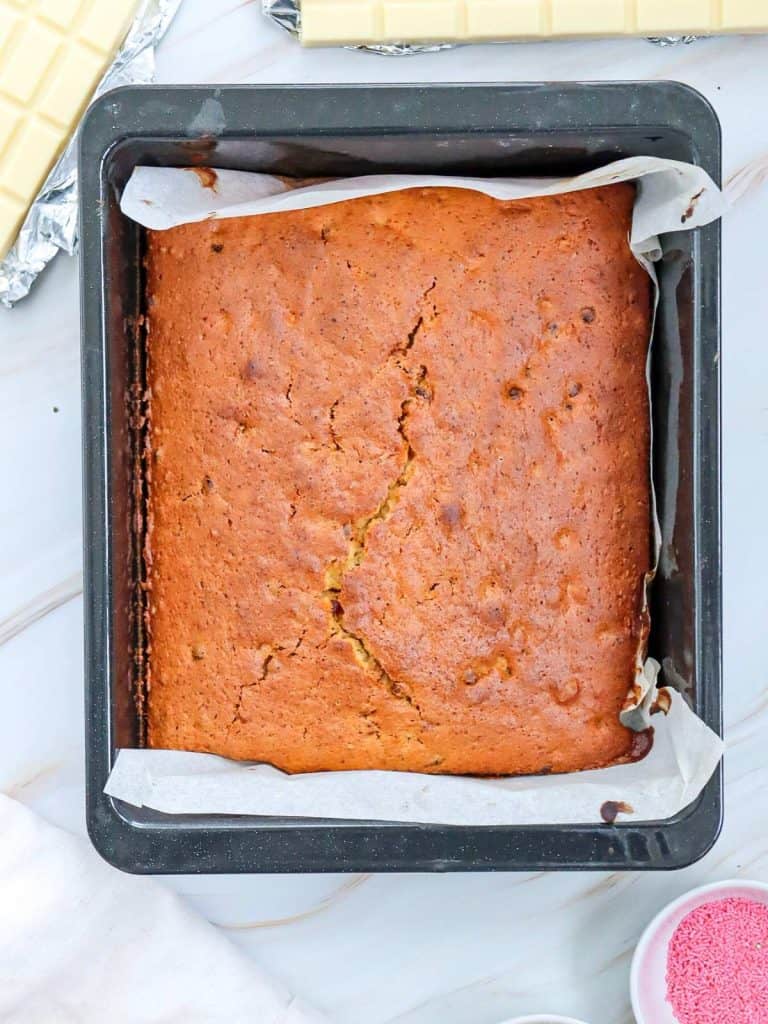
Bake: Bake the cake according to package instructions, or your favorite home-baked recipe. Allow the cake to cool completely. You could even do this the day before if you’d like! That’s what I like to do to save a little time on the day I’m making the cake pops.
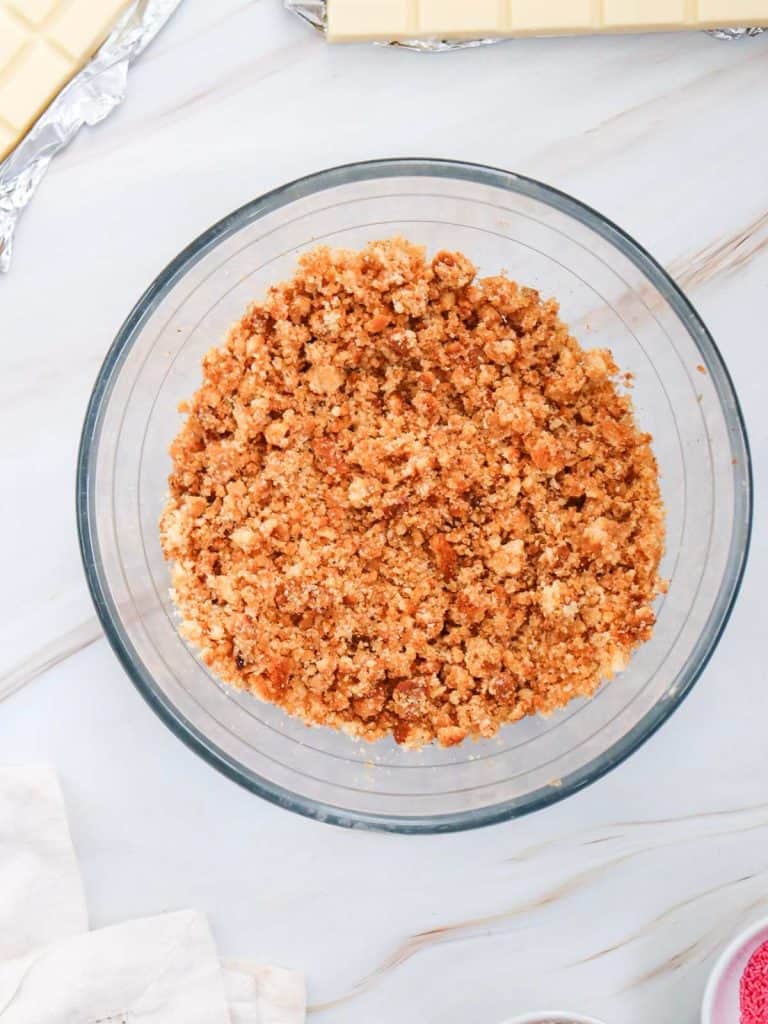
Crumble: Crumble up the cake in a large mixing bowl. I like to start with my hands and then I’ll use two forks to make sure all the pieces are small and really crumbly and that’s way easier to do if you are using a large bowl. We don’t want any large pieces of cake.
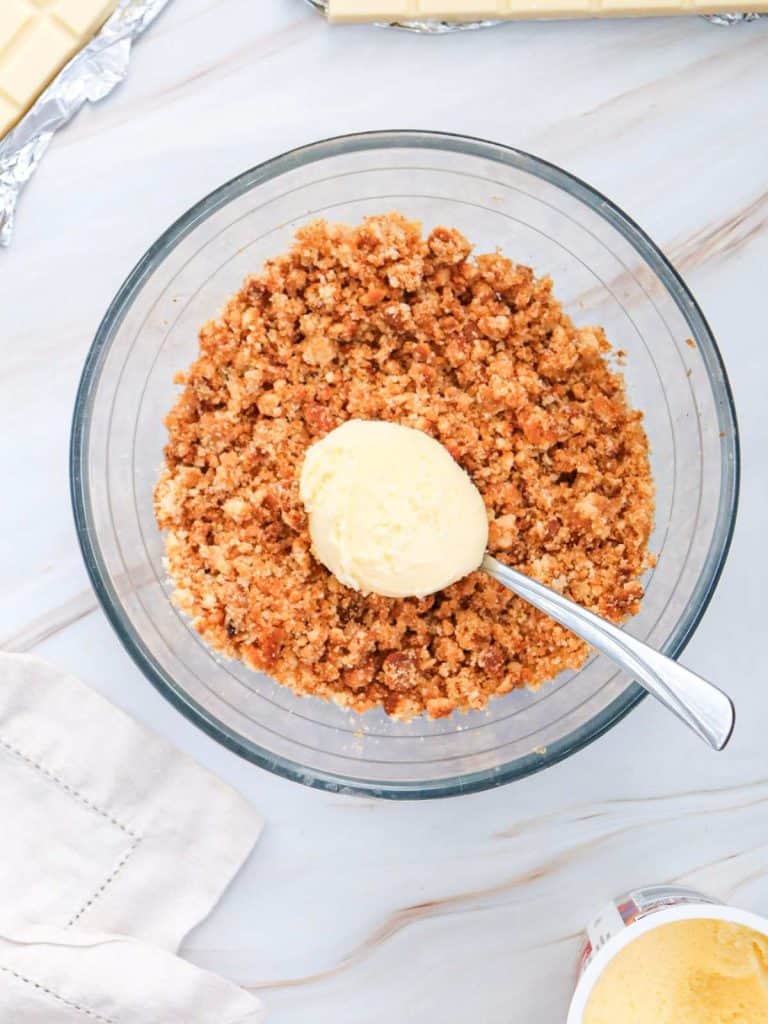
Mix: Add in the frosting and mix well with the crumbled cake crumbs. You should mix until it’s all combined and you can form dough into balls and it holds together well.
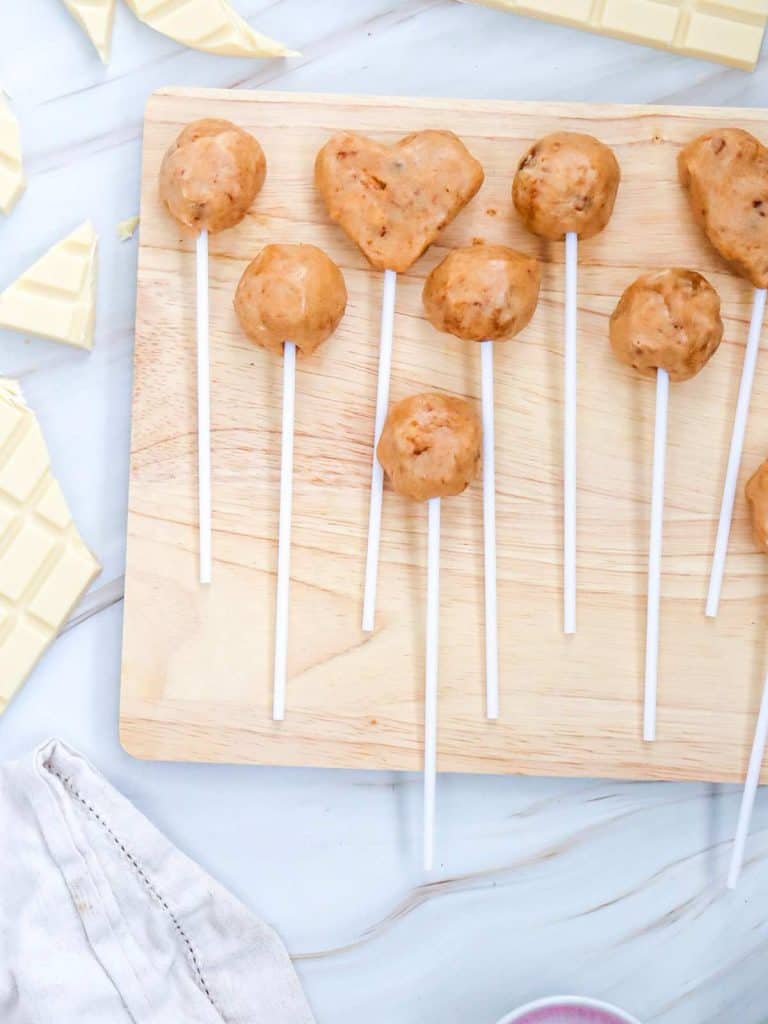
Form Pops: Using your hands, or a small cookie scoop, roll the mixture into small balls, about one inch in diameter. This recipe will makes around 20 balls or cake pops. The pops don’t have to be round! You could also do fun shapes like hearts! Just shape them with your hands! When you have the ball formed, put it on a baking sheet lined with parchment paper or wax paper.
Refrigerate: Let the balls and hearts firm up in the refrigerator for about 30 minutes.
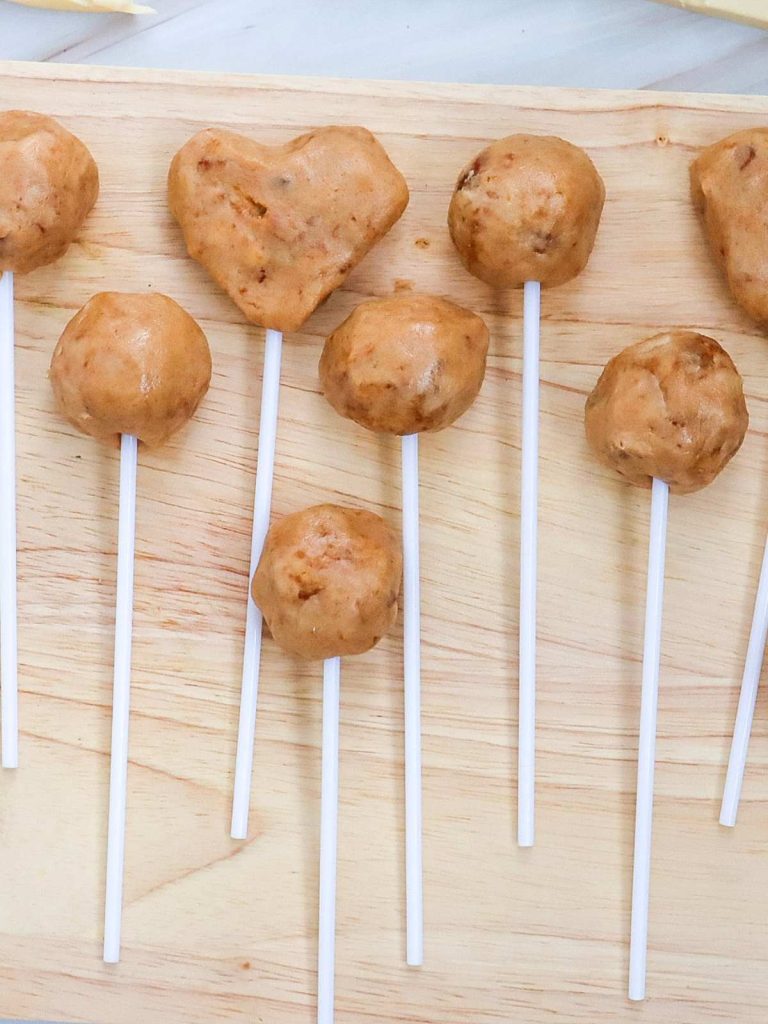
Melt: Melt a small amount of chocolate or candy melts in the microwave (just an ounce or so). You can also use a small pot or double boiler on the stove. Dip the end of each lollipop stick into the melted chocolate and then insert it into the center of each cake ball (or whatever shape you’ve ended up making!). This helps the stick stay firmly attached to the cake pop.
Refrigerate: Place all the cake balls and hearts on the baking sheet (cookie sheet) with the parchment paper again and put them back in the refrigerator for another hour. They need to firm up before you dip them.
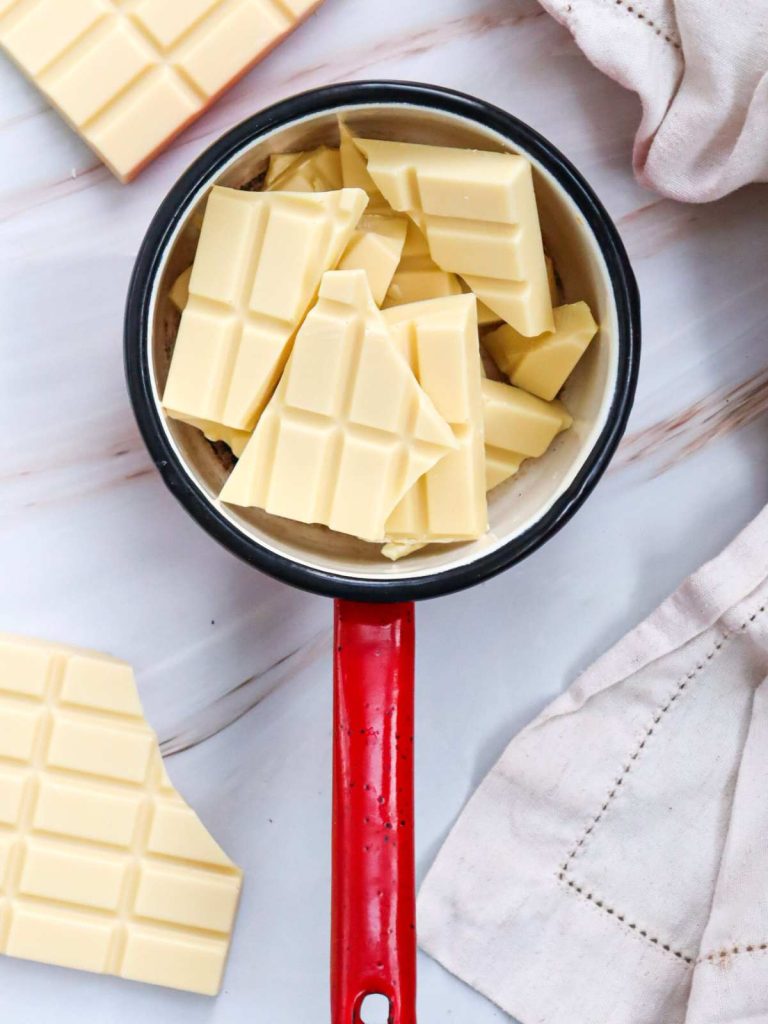
Melt: Melt your white chocolate in the microwave, in a microwave-safe bowl. Look at the package instructions for melting tips and instructions and follow those specific to the chocolate you have. Don’t microwave for more than 30-second intervals to prevent your chocolate from burning.
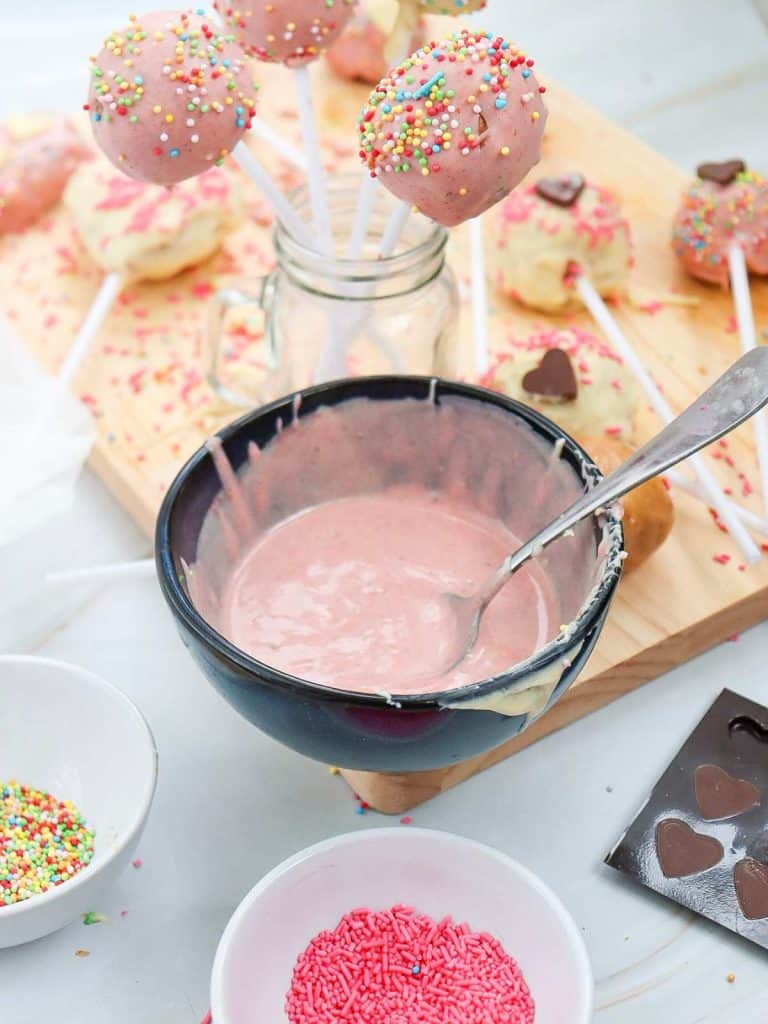
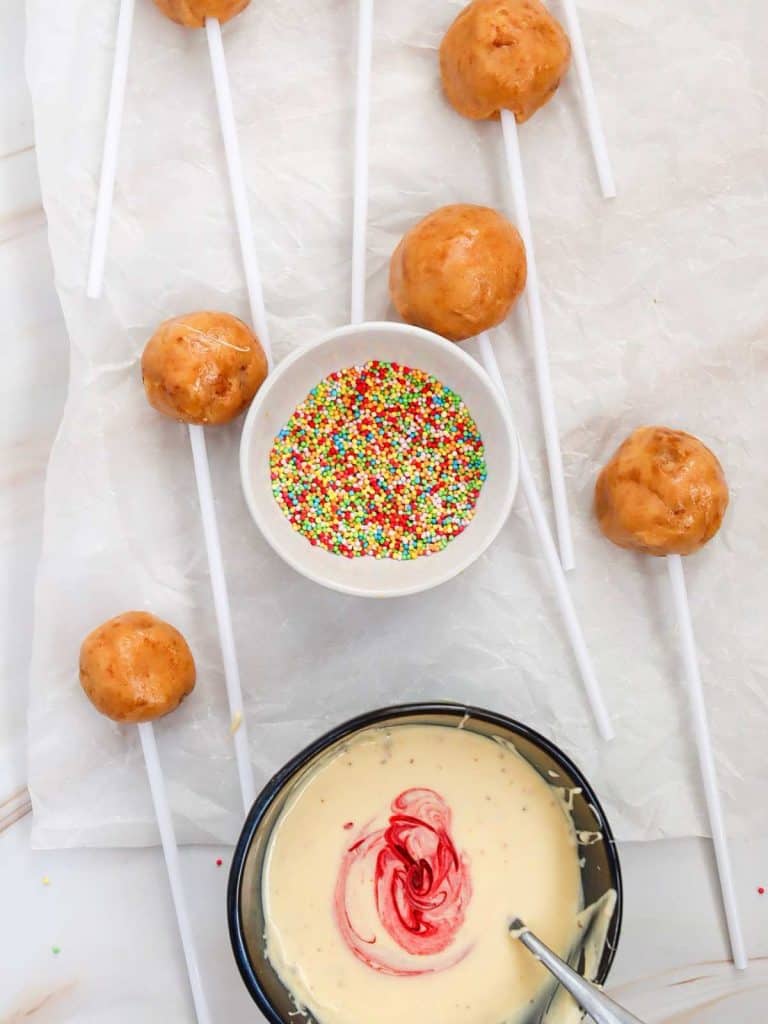
Color: Divide the chocolate however you like and use your food coloring to make pink or red (or both!) shades of chocolate coating.
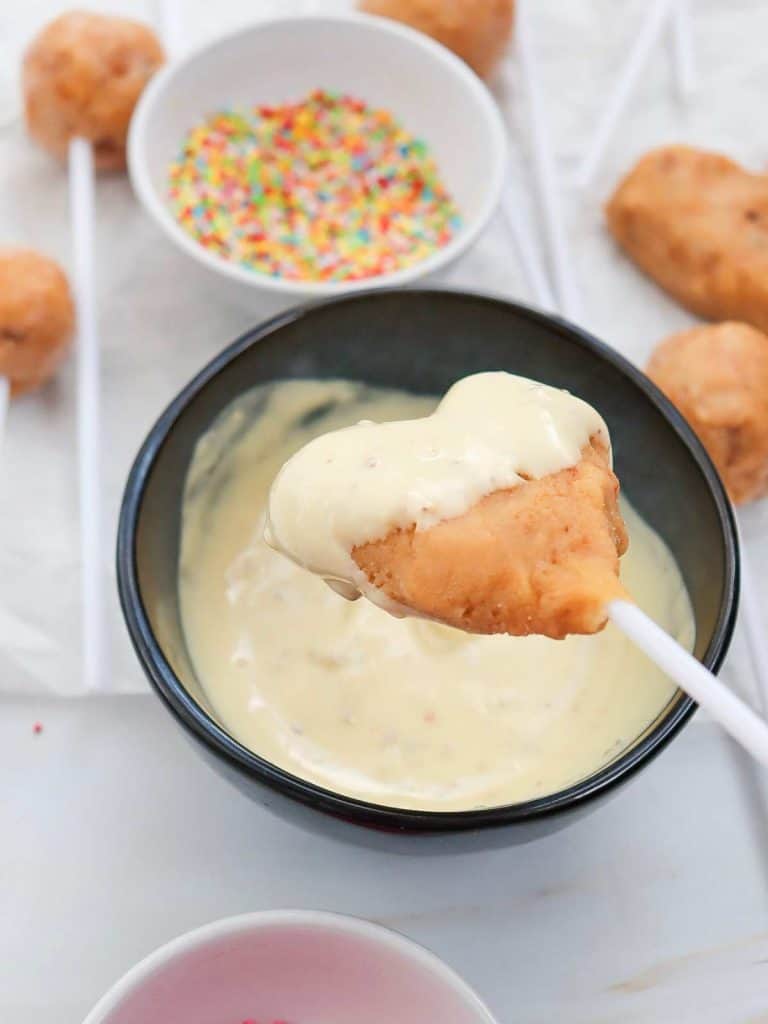
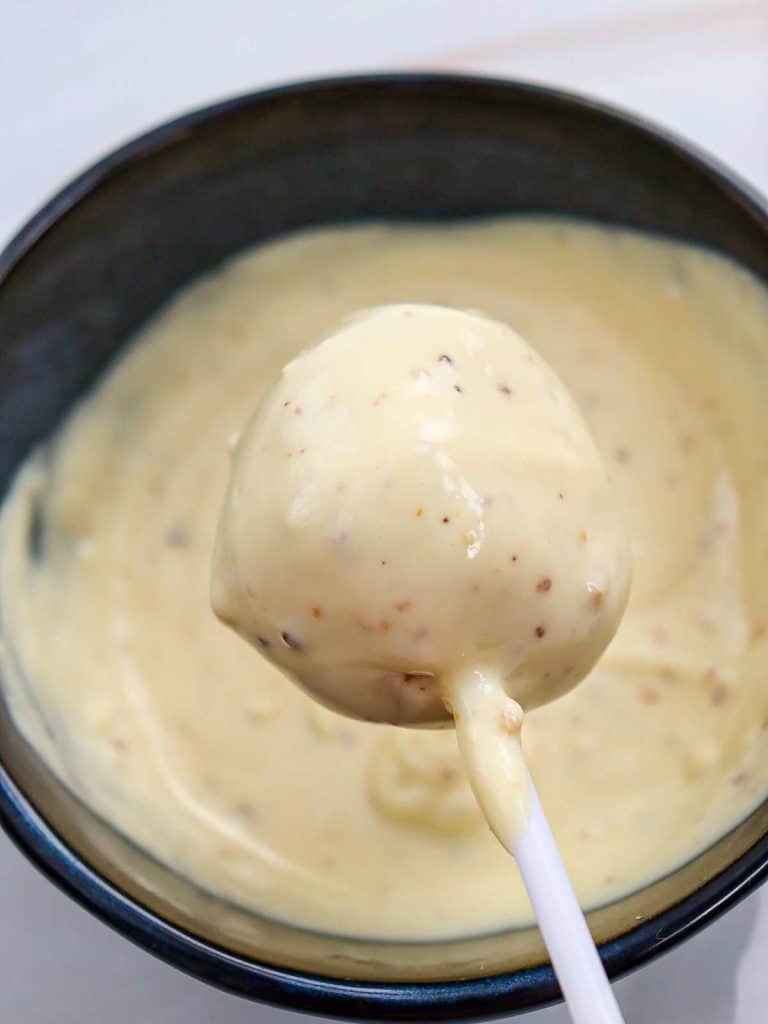

Dip: Now for the dipping process! Dip cake pops into the melted white chocolate, and ensure that they are fully coated. Here’s a video tutorial on how to make the perfect dip for your cake pops! Make as many of each color as you’d like. I prefer to do a combination of all colors! Allow the excess coating and chocolate to drip off the cake pop.
Cool: I like to let the cake pops cool on the baking sheet. After about 10 minutes I’ll add on sprinkles or whatever else I might decorate the cake pops! Let the cake pops cool/harden all the way before storing them. You can let them sit at room temperature or you can put the baking sheet into the refrigerator also.

Serve & Enjoy: Once that coating has hardened then you are ready to go eat your fun Valentine’s Day Cake Pops!
Tips and Notes
- Candy Melts – Candy melts come in all kinds of fun colors for cake pops! And you don’t have to worry about finding food coloring.
- Styrofoam Block – If you want your cake pops to be perfectly round all the way around with a nice smooth finish, you can let them dry and firm up standing up straight in a styrofoam block. This makes for perfect cake pops every time.
- Take Your Time – This takes a bit of practice for the first few attempts. Just keep at it!

Serving Suggestions
- Hot Cocoa: Serve this up with some delicious hot cocoa and you have a wonderful afternoon treat!

Storage Instructions
- Room Temperature – Store at room temperature in an airtight container. If you prefer your cake pops on the cooler side, feel free to store them in the refrigerator.
- Freezer – I don’t recommend freezing the cake pops once you have coated them with the candy or chocolate. If you want to freeze the mix before you dip them, that will work just fine!
Wrap-Up – Easy Homemade Valentine’s Day Cake Pops
I hope you love this Easy Homemade Valentine’s Day Cake Pops recipe! It’s so cute and festive! And so easy to make! I just adore them! They are the perfect gifts to spread around on Valentine’s Day and to give to family, friends, and your Valentine! I can’t wait to hear what you think of this recipe! Happy Cooking! Until then… Just Keep Shuffling!
Printable Recipe Card

Easy Homemade Valentine’s Day Cake Pops
Equipment
- 1 baking sheet
- 20 Lollipop Sticks
Ingredients
- 1 box Cake Mix 9×13 inch — any flavour you like (approximately 3-4 cups crumbled)
- 1 tub Prepared Icing 15.6 oz of Betty Crocker ready frosting
- 12 oz White chocolate chips or melting white chocolate
- 5 drops Pink or red food coloring as needed
- ⅓ cup Heart-shaped chocolates or icing for decoration
- 2 Tbsp Sprinkles of your choice
- 1 tube Writing icing optional
Instructions
- Bake: Bake the cake according to package instruction, or your favorite home-baked recipe. Allow the cake to cool completely. You could even do this the day before if you’d like! That’s what I like to do to save a little time on the day I’m making the cake pops.
- Crumble: Crumble up the cake in a large mixing bowl. I like to start with my hands and then I’ll use two forks to make sure all the pieces are small and really crumbly and that’s way easier to do if you are using a large bowl. We don’t want any large pieces of cake.
- Mix: Add in the frosting and mix well with the crumbled cake crumbs. You should mix until it’s all combined and you can form dough into balls and it holds together well.
- Form Pops: Using your hands, or a small cookie scoop, roll the mixture into small balls, about one inch in diameter. This recipe will makes around 20 balls or cake pops. The pops don’t have to be round! You could also do fun shapes like hearts! Just shape them with your hands! When you have the ball formed, put it on a baking sheet lined with parchment paper or wax paper.
- Refrigerate: Let the balls and hearts firm up in the refrigerator for about 30 minutes.
- Melt: Melt a small amount of chocolate or melts in the microwave (just an ounce or so). Dip the end of each lollipop stick into the melted chocolate and then insert it into the center of each cake ball (or whatever shape you’ve ended up making!). This helps the stick stay firmly attached to the cake pop.
- Refrigerate: Place all the cake balls and hearts on the baking sheet (cookie sheet) with the parchment paper again and put them back in the refrigerator for another hour. They need to firm up before you dip them.
- Melt: Melt your white chocolate in the microwave, in a microwave-safe bowl. Look at the package instructions for melting tips and instructions and follow those specific to the chocolate you have. Don’t microwave for more than 30 second intervals to prevent your chocolate from burning.
- Color: Divide the chocolate however you like and use your food coloring to make pink or red (or both!) shades of chocolate coating.
- Dip: Now for the dipping process! Dip cake pops into the melted white chocolate, and ensure that they are fully coated. Make as many of each color as you’d like. I prefer to do a combination of all colors! Allow the excess coating and chocolate to drip off the cake pop.
- Cool: I like to let the cake pops cool on the baking sheet. After about 10 minutes I’ll add on sprinkles or whatever else I might decorate the cake pops! Let the cake pops cool/harden all the way before storing them. You can let them sit at room temperature or you can put the baking sheet into the refrigerator also.
- Serve & Enjoy: Once that coating has hardened then you are ready to go eat your fun Valentine’s Day Cake Pops!
Nutrition
Did you try this recipe? I’d love to see it! Tag @supermomshufflescooking on Instagram and leave a 🌟🌟🌟🌟🌟 review below!
Want to remember this? Save this recipe to your favorite Pinterest board!