Blackberry Pork Tenderloin
Blackberry pork tenderloin is an amazing glazed pork tenderloin recipe that cooks low and slow and could not be easier… or more delicious! It will become a family favorite immediately!

Want to save this recipe for another time?
Blackberry Pork Tenderloin is one of my favorite dinners to prepare. It’s easy to prepare for a small crowd or to scale up for a large crowd. The recipe takes a little preparation at the beginning to get it set up to roast but then after you put it in the oven you can walk away for a few hours. It’s delicious year round but somehow this dish just screams Welcome Spring to me!
Where Did This Recipe Come From?
This recipe was inspired by a trip with my husband to Charleston, South Carolina. We had a version of this pork at one of the fancy restaurants in the downtown area. I knew once I got home I would have to attempt to re-create the magic.
I ended up testing out several recipes I found online and ultimately ended up taking bits and pieces from lots of recipes and creating my own recipe and method for the YUMMIEST version of Blackberry Pork Tenderloin you will ever eat!
Also, it should be said that I’m generally NOT a fan of any kind of meat dish that tastes like fruit. Lemon chicken? Orange Beef? YUCK. But this tangy blackberry sauce is sweet and savory at the same time and it’s the sauce that just pushes this dish right over the edge into amazing deliciousness.
This post contains affiliate links. If you purchase something from those links, I may make a small commission. See our full Disclosure and Disclaimer Policy here.
Holiday… or Every Day?
I’ll be serving this for Easter dinner at my house this year for sure. It’s our tradition for Easter in our little family. However, no need to wait for a major holiday. This recipe is pretty darn easy and would also work for an average Tuesday night too. If you aren’t a big pork fan it’s also delicious with chicken. And it makes delicous leftovers!
Ingredients
- Pork tenderloin (2 pounds – probably 2 small loins)
- Garlic cloves
- Fresh or frozen blackberries
- Apple cider vinegar
- Light brown sugar
- Beef stock
- Fresh thyme (Dried is fine too!)
- Fresh rosemary (Dried is fine too!)
- Salt
- Pepper
- Vegetable Oil
- Cornstarch
Kitchen Equipment Needed:
This post contains affiliate links. If you purchase something from those links, I may make a small commission. See our full Disclosure and Disclaimer Policy here.
Pots, Pans and Dishes
- 9×13 baking casserole dish – I have this dish and I adore it because it comes with a lid that fits it. No more fooling with aluminum foil or plastic wrap! Plus it keeps the smells of your dish inside the dish and not in your refrigerator as foil and plastic wrap do!
- Braising Pan – This is my favorite kitchen pan. It’s expensive, but I use it all the time and it’s just fantastic. My favorite brand is Le Creuset, but you could get any brand that fits your needs! I love that this transfers from stovetop to oven perfectly!
- 3-Quart Saucepan – This is what I have at home and I love it. I use it for sauces all the time, but my favorite thing is to put a glass bowl over it and make it a double boiler.
Utinsels
- Oven Mitts – This is a heavy and hot dish! Make sure you have good oven mitts to protect your hands!
- Table Serving Trivet – This dish is HOT and will stay hot. Make sure you put it on top of something to protect your countertop or table!
- Santoku Knife – You don’t have to go out and buy a nice knife. BUT, if you were in the market for a knife, this is the one I couldn’t do without, and the one I go for time and time again. It’s wonderfully and beautifully made. I’ve had this knife for over 10 years and it’s my favorite thing in my entire kitchen. You truly do get what you pay for in knives. These are made in Germany, but are widely sold in the United States now. You can go way higher in quality as well, this is just a starting point.
- Cutting Board – I’ve had these for years and I love them. Mine are red! They are the perfect sizes, easy to store, and have a little groove around the edges to stop juices from flowing all over. This is the cutting board I go to time and time again when I’m cooking.
- Bamboo Spoon Set – I love to use Bamboo spoons for cooking and stirring in the kitchen! They come in so many shapes and sizes that are just perfect for every kitchen job!
- Instant Read Meat Thermometer – You really need a meat thermometer to know when larger cuts of meat are done cooking. This one is my favorite that I’ve had so far!
- Tongs – I really like these tongs! Especially for slow cooker or instant pot meals. The rubber on the ends of the tongs prevents the tongs from cutting right through tender meat and vegetables.
- Airtight Food Storage Containers – These are fantastic. They keep food air-tight and fresh so well!
Cooking Instructions
Getting Started
To begin this
Step 1 – Assemble the Sauce
First, I like to start the sauce cooking because it needs to simmer for about thirty minutes so that the flavors all meld together. Simmer the saucepan over medium heat.

PS – This is my favorite picture from making this entire recipe. It looks so gorgeous with all the ingredients just thrown in the pot!
Put all the sauce ingredients in a 3-quart pot and bring to a boil. Sauce ingredients are the garlic, blackberries, vinegar, brown sugar, beef stock, thyme, rosemary, and salt (only 1 teaspoon!), and pepper (only 1 teaspoon!).
*NOTE – As seen in the picture above, no need to chop anything into small pieces, just throw it in whole. We will strain this sauce before you serve it over the pork.
Step 2 – Simmer the Sauce
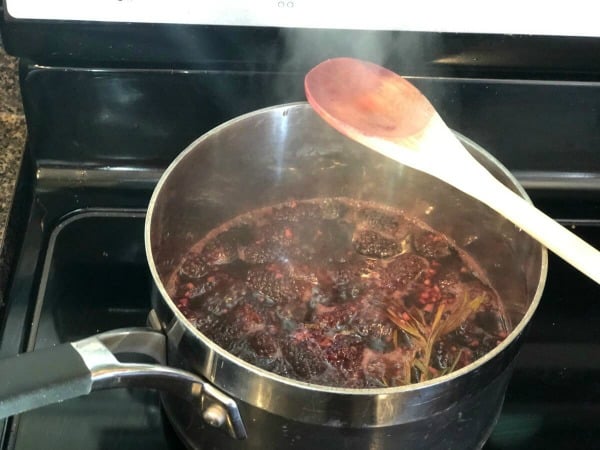
Turn down the heat to simmer for 30 minutes. After 30 minutes, the sauce will still be very liquidy and that’s how you want it to be.
Step 3 – Go ahead and Preheat Oven
Preheat your oven to 325°. It takes a little bit for our oven to warm up.
Step 4 – Sear the Pork


In the meantime, in a heavy pan that can go from the stove to the oven that has a lid (I use a shallow Dutch oven), drizzle the oil in the pan and turn it on to high heat.
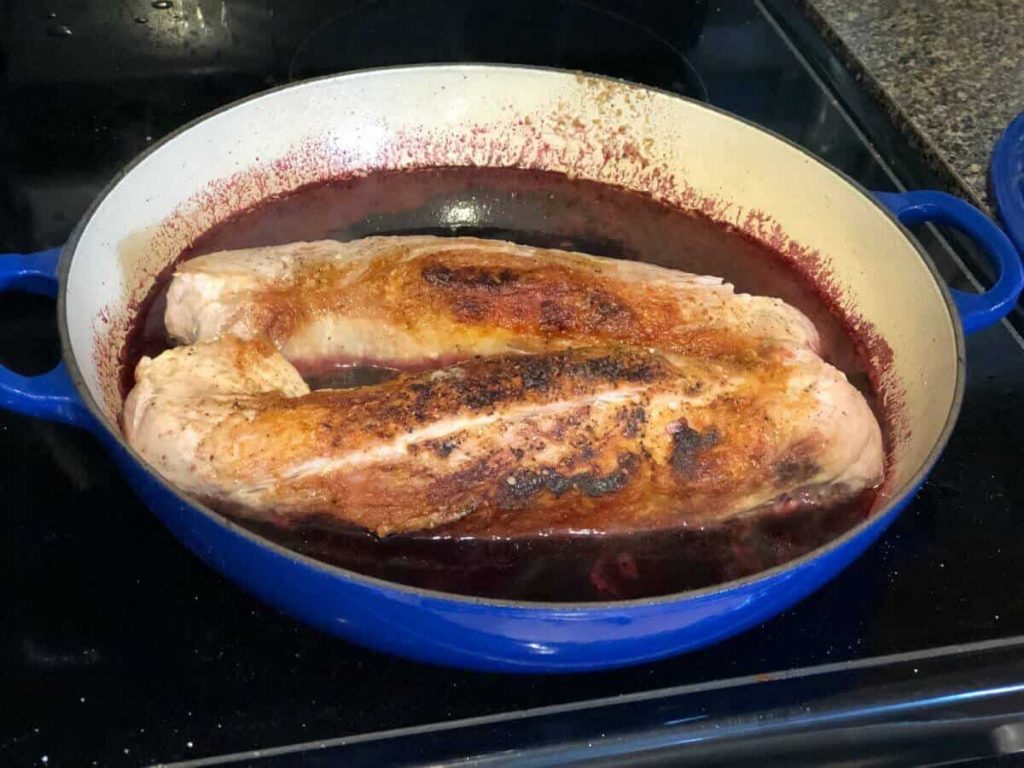
Generously salt and pepper your pork tenderloin on all sides with the remaining tablespoon of salt and pepper. Wait for the oil to be rippling/wafting hot and then place your pork tenderloin down on one side to sear. When the meat releases easily from the pan, flip it to the other side. Continue flipping the pork until all sides are browned and seared. This locks in the moisture and makes for great flavor for your pork.


Once the pork is browned/seared on all sides, remove the pork from the pan and remove the pan from the heat for a few moments.
Step 5 – Strain The Sauce
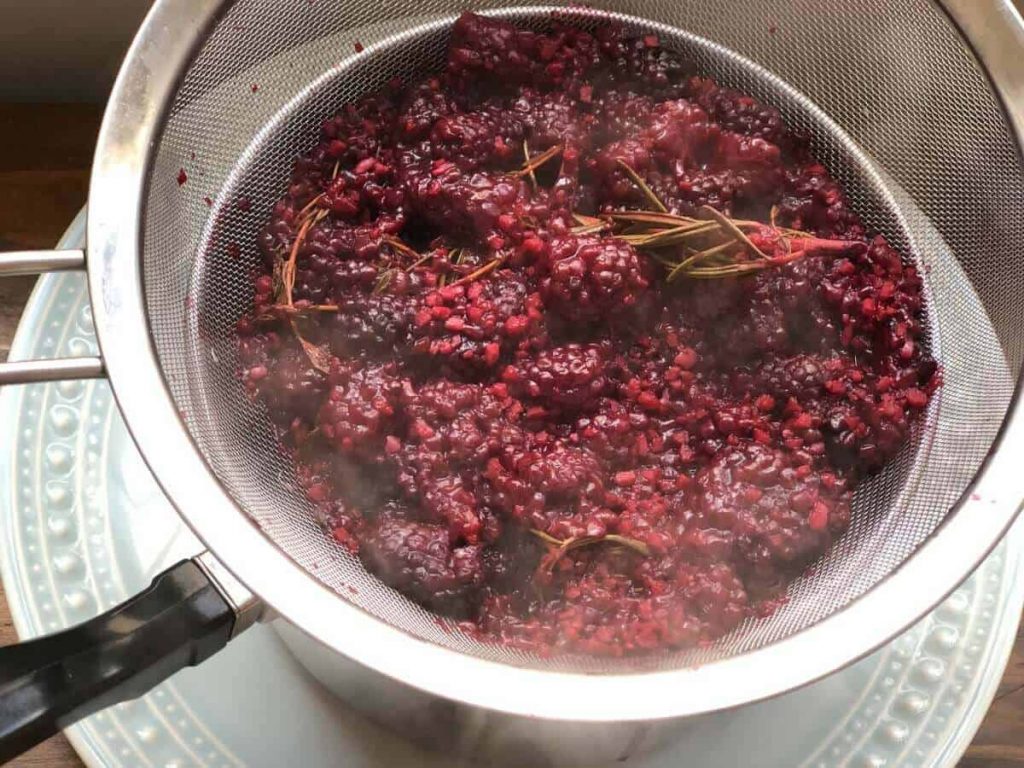
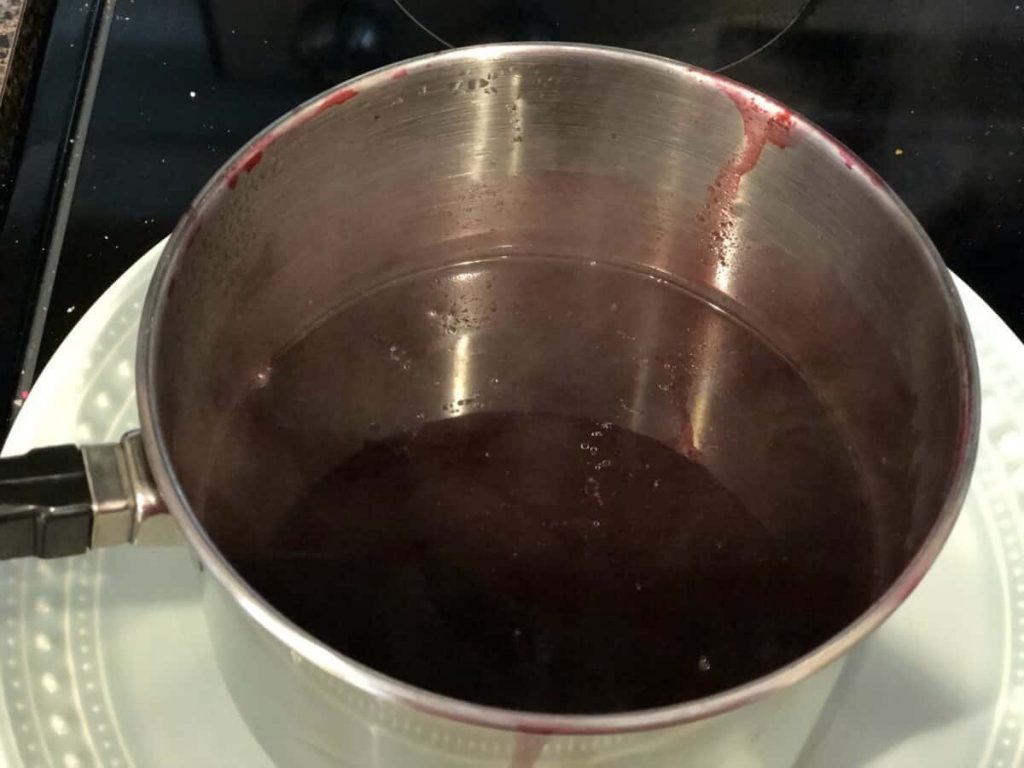
By now, your blackberry sauce should be done simmering. Remove it from the heat and pour the sauce through a fine mesh strainer into a heat-safe bowl or another pot. Discard the contents of the strainer. This leaves you with a nice, smooth blackberry sauce.
Step 6 – Combine the Sauce and Pork
Put your braising pan back on the heat and pour the blackberry sauce into the braising pan. Stir the sauce around in the pan and scrape up any pieces of pork and brown bits that are stuck to the pan (this is flavor!). Put the pork back into the pan with the sauce. Pour all of the blackberry sauce into the pan with the pork tenderloin.
Step 7 – Roast the Pork with Sauce
Put the lid onto the braising pan and put the pan into your 325° oven and let cook for about 2.5 hours. (I had 2 small tenderloins that weighed a total of 2.0 pounds, and I ended up cooking mine on 325° for about 2.5 hours, turning the pork over about halfway through. I like to cook mine low and slow so that the meat is just falling apart and so delicious.)
Step 8 – Flip the Pork Tenderloin
After an hour and fifteen minutes, flip the pork tenderloin over so the other side cooks in the sauce.
Step 9 – Thicken the Sauce
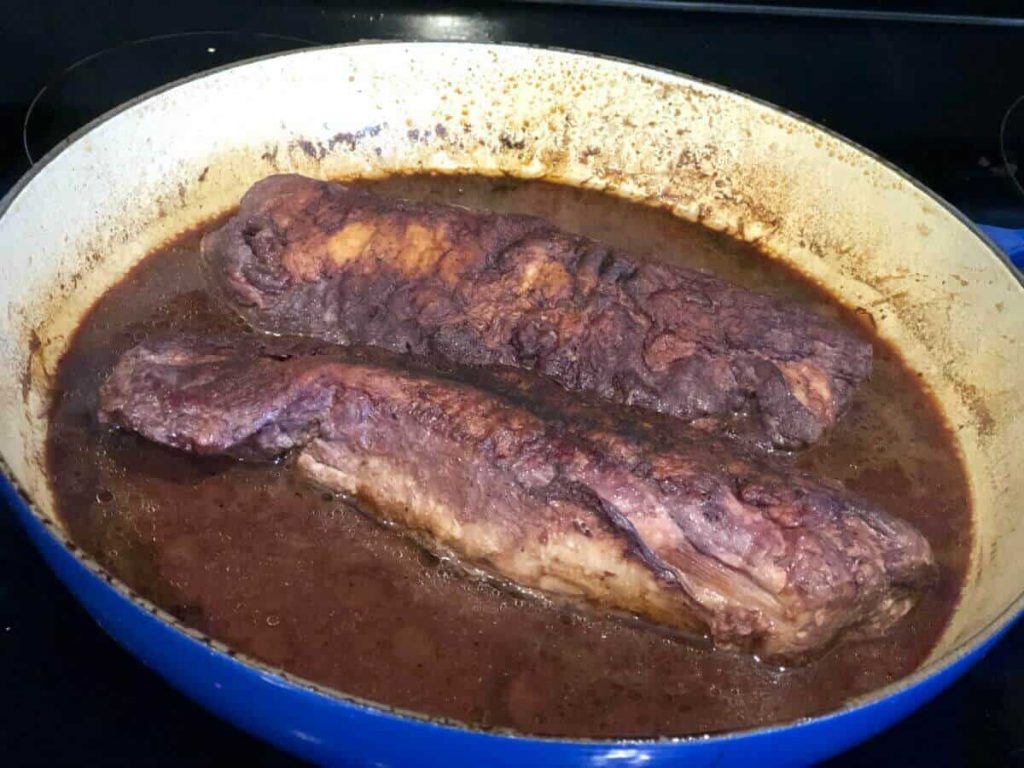
When the pork is done, I remove it from the oven and turn the oven off. I gently pull the pork out of the pan, put it on a plate and cover it with aluminum foil to let it rest for a few minutes. The foil will keep the pork warm.
Leave the blackberry sauce in the pan, and put it back on the stove. The sauce has cooked for a good long while already, but I like to thicken it up so it’s gooey and thick on top of the sliced pork.
To thicken it up, bring it to a boil, and add in a cornstarch slurry (1 TBSP of cornstarch stirred together with 1 TBSP of water until smooth). Once the sauce begins to thicken, I turn the heat down and stir another minute, and then remove from heat.
Step 10 – Slice the Pork and Serve
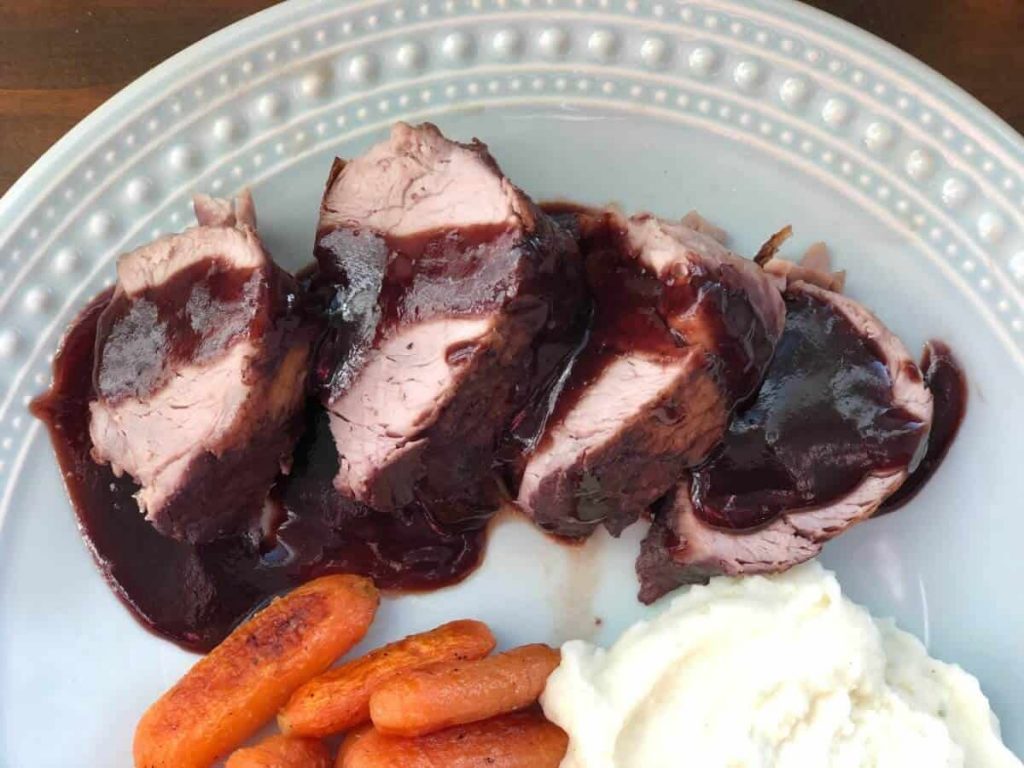
While the sauce rests and thickens for a moment, go ahead and slice up your pork and put it onto plates. Then drizzle as much or as little sauce over your pork as you would like. It’s
Side Dishes
I like to serve this dish with simple roasted carrots and garlic mashed potatoes. I could get expelled from living in the South for saying this, but I use an instant mashed potato pack that has the roasted garlic flavor. They are delcious and I’m not even a little sorry!
Leftovers Storage
The leftovers of this meal — if there are any! — should be stored in an airtight container in the refrigerator for up to three days.
Frequently Asked Questions
You could and it would be so good! You could just make the sauce and thicken it, and serve it with the grilled pork tenderloin, and that would be SO, so good. Or your second option would be to double the sauce recipe and marinade the pork before grilling for several hours. Either way, this would be absolutely delicious!
Any vinegar will do. The apple cider vinegar gives this sauce a special tang. But a solid substitute would be balsamic vinegar, or even champagne vinegar!
Sure thing! And that would be delicious. YOu might want to back off the amount of brown sugar in the sauce if you use the blackberry preserves. The preserves likely have plenty of sugar to go around already!
Wrap Up – Blackberry Pork Tenderloin
In conclusion, this meal takes a little work, but it’s totally worth the effort. It makes an amazing dish with a real “wow” factor. Pork tenderloin with a blackberry glaze is just a spectacular “Wow” kind of recipe that’s perfect to keep in your arsenal of recipes!It’s such a pretty simple fake out, the recipe really isn’t complicated at all! I hope you will make this dish for your family soon and that you all enjoy it as much as we do!

Blackberry Pork Tenderloin
Equipment
- 3-quart saucepan
- medium mesh strainer
- 3-4 quart braising/roasting pan with lid
Ingredients
- 2 pounds pork tenderloin
- 4 cloves garlic smashed/chopped
- 1 pint blackberries fresh or frozen
- ½ cup apple cider vinegar
- ½ cup brown sugar light or dark is fine
- 1½ cups beef stock
- 1 teaspoon thyme 2 fresh sprigs
- 1 teaspoon rosemary 2 fresh sprigs
- 1 Tablespoon salt
- 1 teaspoon salt
- 1 Tablespoon black pepper
- 1 teaspoon black pepper
- ⅓ cup vegetable oil
- 1 Tablespoon corn starch
Instructions
- Combine (No need to chop anything, just throw it in whole. The sauce will be strained.) garlic, blackberries, apple cider vinegar, brown sugar, beef stock, thyme, rosemary and 1 teaspoon salt and 1 teaspoon black pepper into a 3 quart saucepan and bring to a boil.
- Once boiling, reduce heat to simmer and let simmer 30 minutes.
- Go ahead and preheat oven to 325°.
- While the sauce is cooking, on your stovetop, put 1/3 cup vegetable oil in your braising pan or Dutch oven and turn the eye onto medium high heat.
- Use the remaining 1 Tablespoon of Salt and black pepper to season the outside of the pork tenderloin, on all sides.
- Once the oil is rippling in the pan (just give it a few minutes and it will be ready), place your pork tenderloin(s) in the pan and let them sear on all sides. To let them properly sear, leave the meat alone until it moves easily on it's own from the pan. If you try to jiggle it in the pork and it is firmly stuck, it's not ready to turn yet. Continue flipping until all sides are browned and seared.
- When the pork is done searing (not cooked through) remove from heat. Put the pork on a plate to the side for a moment.
- Once your sauce has cooked for 30 minutes, pour it through a fine mesh strainer into a heat safe bowl or another pot. Discard the contents of the strainer and pour the freshly strained sauce into the pan where the pork has just finished cooking.
- Stir the sauce around in the pan and scrape up any pieces of pork and brown bits that are stuck to the pan (this is flavor!).
- Gently put the pork back into the pan with the sauce and pour any juices from the plate into the pan as well.
- Put the lid onto the pan and put it into a 325° oven. After 1 hour 15 minutes, take the pork out of the oven and turn it over and return to oven.
- After another 1 hour and 15 minutes, remove pork from oven and let rest with the lid on for 10 minutes.
- Remove the pork from the pan and put on a plate and cover well in aluminum foil. The meat will rest and this lets the juices redistribute.
- Meanwhile, put the pan on a stove eye over medium high heat and let the remaining sauce come up to a boil.
- In a small container, mix 1 Tablespoon cornstarch with 1 Tablespoon cold water. Whisk until a smooth liquid forms with no lumps.
- When the sauce boils, add in the cornstarch slurry and immediately turn the heat down to medium low. Stir with a whisk until the sauce thickens. Remove from heat once thickened.
- Serve over sliced pork tenderloin and enjoy.
Notes
- 3 quart saucepan
- medium sized mesh strainer
- 3-4 quart braising pan with lid
- Aluminum foil
Nutrition
Related Recipes:
- One-Pot Tuscan Chicken Gnocchi Bake
- Easy One-Pot Cheesy Meat Bake
- Green Apple Cabbage Summer Coleslaw Recipe
Want to remember this? Pin this recipe for “Blackberry Pork Tenderloin” to your favorite Pinterest Board!